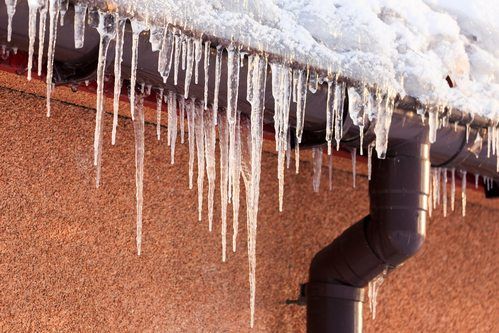
Many homeowners in cold climates are all too familiar with ice dams, thick accumulations of ice that form over the eaves of a house. Cycles of freezing and thawing can result in a leaky roof, which in turn can produce sagging plaster, stains, and other damage. Last month, we explored how proper roof temperature and ventilation can help prevent these ice dams. Today, we’d like to explore another preventive method: installing a moisture barrier. If you’re adding new roofing to your home, read our moisture barrier tips before you get started.

What Is a Moisture Barrier?
There are a number of moisture barrier products on the market that will prevent water from working its way into your home via ice dams. Also known as moisture guards or ice and water shields, these versatile underlayment products are installed immediately on the top of your sheathing, just below your shingles, tiles, or other roofing materials. They are made from a rubberized asphalt mixture with a very sticky backing, which seals the roof when installed, forming a continuous barrier to water.
Benefits of Moisture Barriers
- A moisture barrier protects against water infiltration, which can result from the freeze/thaw cycle, wind-driven rains, and normal water flow, especially around eaves, rakes, valleys, vents, chimneys, and skylights.
- It can protect vulnerable sections of the roof, including valleys and roof penetrations.
- The self-adhesive membrane bonds firmly to the roof deck without the need for heat or special adhesives.
- The membrane easily forms watertight overlaps without special treatment.
- The moisture barrier protects your roof under most standard sloped-roof coverings.
- The membrane is unlikely to crack, dry out, or rot. It will protect your roof for years to come.
Moisture Barrier Tips
Interested in adding a moisture barrier to your new roof? When you work with a professional roofing company, you can trust that the roofers understand how to properly apply the barrier. Nevertheless, you may find it helpful and reassuring to review these moisture barrier tips. They apply to most water barrier products from respected companies like Tamko, Owens Corning, and GAF.
- Apply the moisture barrier in fair weather for best results, when the air, substrate, and membrane are above 35 degrees Fahrenheit.
- Before you start, remove all dust, dirt, loose nails, and protrusions from the deck of new roofs. Remove all debris, shingles, roofing felt, nails, and existing roofing materials from the deck of existing roofs.
- Apply the moisture barrier from the bottom of the roof to the top, staggering and overlapping the end seams by six inches. Roll the lower edges of each course firmly using a wallpaper roller or hand roller.
- To ensure ice dam protection, be sure the moisture barrier reaches above the expected level of ice dams.
- The moisture guard underlayment should not be exposed to the elements for more than 90 days before application.
Get Expert Advice from the Pros
Looking for an experienced and knowledgeable team of roofers to install your new roofing and moisture barrier? Give GlennStone a call if you live in southwest Missouri. We understand how important ice dam prevention is to the protection and value of your roof, and we can help you decide which moisture barrier to purchase and have installed. With our help, you can rest easy knowing that you’ve selected the best products for your needs.
For more moisture barrier tips or other personalized advice, please give us a call at 417-860-8125, send an e-mail to info@GlennStone.net, or contact us online. You can even set up a free roofing consultation by requesting a quote from us today. We look forward to hearing from you!
